Making your own sourdough starter at home might seem daunting, but it’s a surprisingly simple and rewarding process that anyone can master. A sourdough starter is the heart of sourdough bread, a natural leavening agent made from flour and water that’s teeming with wild yeast and beneficial bacteria. This magical mixture not only helps dough rise but also gives sourdough bread its signature tangy flavor and chewy texture. Plus, sourdough bread comes with health benefits, like being easier to digest and offering better nutrient absorption. If you’re ready to unlock the secrets of sourdough baking, follow this easy, beginner-friendly guide to creating your own starter.
What You’ll Need
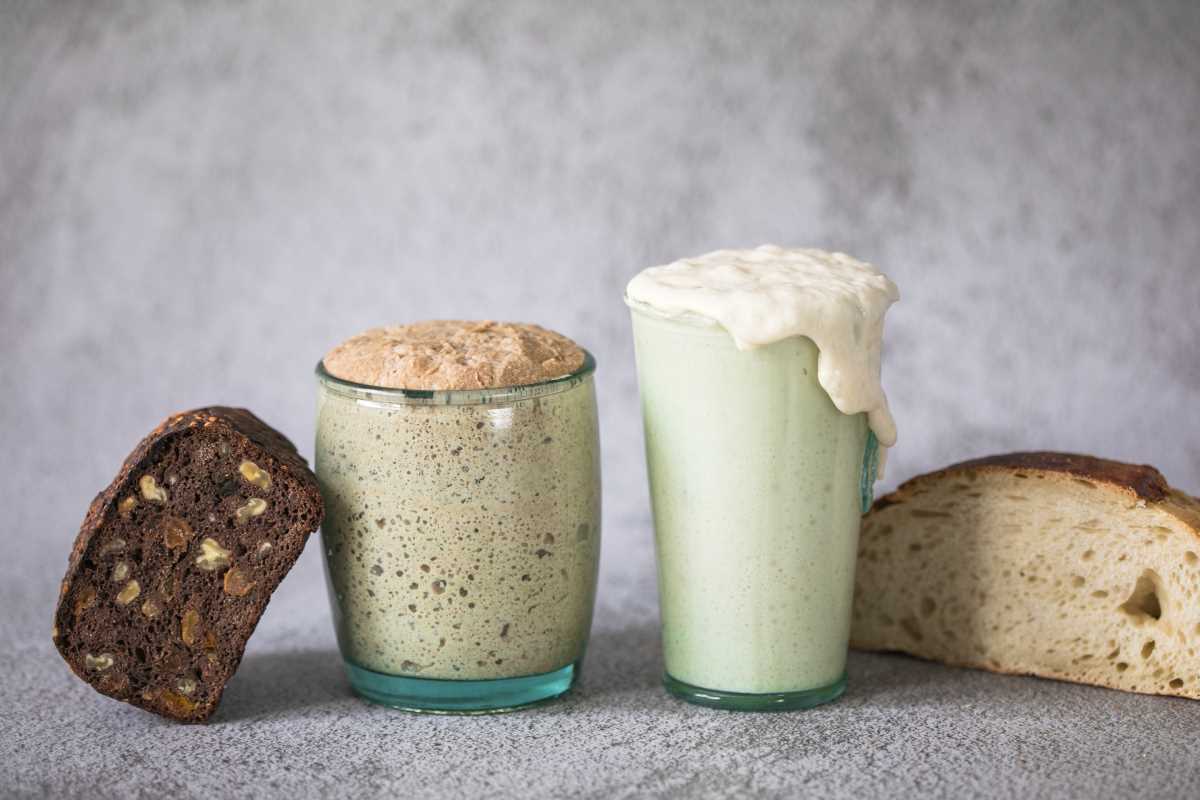
The beauty of sourdough starter lies in its simplicity. You only need two ingredients:
- Flour – All-purpose flour works just fine, but many bakers prefer whole wheat or rye flour for the first step because they contain more natural microorganisms and nutrients.
- Water – Filtered or bottled water is ideal, as heavily chlorinated water may hinder the fermentation process. Room temperature water is best.
- You’ll also need a few tools:
- A glass jar or container – Choose one that’s large enough to allow the starter to double in size as it ferments.
- A spoon or spatula – For mixing.
- A kitchen scale – This is highly recommended for accuracy, though measuring cups will work too.
- A breathable cover – Use a loose lid, a cloth secured with a rubber band, or something similar to allow airflow while keeping dust out.
- Now, with your supplies at the ready, it’s time to get started.
Step 1: Create the Starter (Day 1)
Measure the Ingredients
Combine 60 grams (1/2 cup) of flour with 60 grams (1/4 cup) of water in your container. Stir until you get a thick, smooth paste. Make sure all the flour is hydrated with no dry spots.
- Mark the Level: Using a piece of tape or a marker, note the level of the mixture on the jar so you can easily see how it rises.
- Cover and Wait: Cover the container loosely and set it aside at room temperature (ideally between 68-75°F). Choose a spot out of direct sunlight where the temperature is stable.
This is the first step to inviting wild yeast and friendly bacteria into your mixture—they’re in the air and the flour itself, ready to get to work.
Step 2: Feed the Starter (Days 2-5)
The following days are all about feeding and nurturing your starter to help it grow strong and active.
You may not see much activity yet, but that’s okay! Discard about half of your starter (roughly 60 grams) and replace it with 60 grams of fresh flour and 60 grams of water. Stir well and mark the new level in the jar.
By day three or four, you should start noticing bubbles in the mixture and a fruity or tangy smell—these are clear signs your starter is fermenting. Keep feeding it daily, discarding about half the starter and replacing it with equal parts of fresh flour and water.
By the fifth day, your starter should be doubling in size a few hours after feeding, producing plenty of bubbles, and giving off a pleasantly sour aroma. Congratulations! You now have a vibrant sourdough starter ready to use for baking.
If your starter isn’t quite doubling by day five, don’t worry. Sourdough starters can take longer to develop depending on your environment. Keep feeding it daily and be patient.
Maintenance and Feeding Schedule
Once your sourdough starter is active, keeping it healthy is easy:
- If you bake often, keep your starter at room temperature and feed it daily, discarding half and replacing it with fresh flour and water.
- If you bake less frequently, you can store your starter in the refrigerator. Feed it once a week, letting it sit at room temperature for a few hours after feeding before refrigerating again.
Tips for Success
Choose the Right Flour and Water
Whole grain flours and non-chlorinated water encourage faster fermentation. However, once your starter is established, you can switch to all-purpose flour if desired.
Temperature Matters
If your kitchen is too cool, fermentation may slow down. Place the jar in a warmer spot, like near the oven (but not on top of it), to keep the process moving.
Check Consistency
Your starter should resemble thick pancake batter. If it’s too runny or too thick, adjust with a bit more flour or water.
The Float Test
To know if your starter is ready for baking, drop a small spoonful into water. If it floats, your starter is lively and ready to leaven your bread!
Troubleshooting Common Issues
- No Bubbles or Growth: Ensure your water isn’t too chlorinated and your temperatures are warm enough. Switch to whole wheat or rye flour for a few days to boost activity.
- Strong Odor: A sharp, vinegary smell is normal, but if it smells like alcohol (faintly of nail polish remover), this means it’s hungry. Feed it more often.
- Mold: If you notice mold (furry or green spots), discard the starter and begin again. Always use clean utensils and containers to avoid contamination.
Starting sourdough at home opens the door to a whole world of bread that’s flavorful, rustic, and nutritious. Your homemade starter gives sourdough unique charm, as it’s a living organism that evolves and adapts to your kitchen environment. Plus, it’s a great way to experiment with baking as a creative outlet while enjoying the benefits of completely natural, long-fermented bread.
By following these steps, you’ll soon have a thriving sourdough starter—and delicious homemade bread—right in your kitchen!